macOS Agent Installation via Jamf Now
Jamf Now is an MDM solution that provides an easy way to manage Apple devices for small and medium-sized businesses. LimaCharlie sensors can be deployed via Jamf Now for easy app distribution and inventory capabilities.
Prerequisites
- a Jamf Now account;
- a provisioning profile that grants the necessary pre-authorizations (such as is available here) for deployment on the clients;
- a LimaCharlie Mac Sensor installer package (
.pkg) that's configured as desired for deployment on the clients.
Set up your account on Jamf Now
- Create a Jamf Now account at https://signup.jamfnow.com, and log in.
- Choose the "APNs" tab in the sidebar, and click "Get Started".
- Click "Download Certificate Signing Request.plist" and save the plist.
- Click Next in the lower right.
- As per the "Create an Apple Push Certificate" checklist shown, click "Open the Apple Push Certificates Portal".
- Log in with your Apple ID.
- On the "Apple Push Certificates Portal" page to which you are redirected, click the green "Create Certificate" button.
- Accept the Terms of Use, and click Continue.
- On the "Create a New Push Certificate" page to which you're redirected, specify the plist you downloaded in step 2 and click Upload.
- On the "Confirmation" page, click Download and save the new PEM certificate file.
- Navigate back to the Jamf Now page as at step 5, and click Next in the lower right.
- On the "Upload Push Certificate" page, specify the PEM you downloaded in step 10.
- Under "Save Your Apple ID", annotate same as Jamf invites to do so, and click Save.
Prepare the LimaCharlie sensor installer package on Jamf
As a prerequisite you must have on hand a LimaCharlie Sensor installer package (.pkg) that's configured as desired.
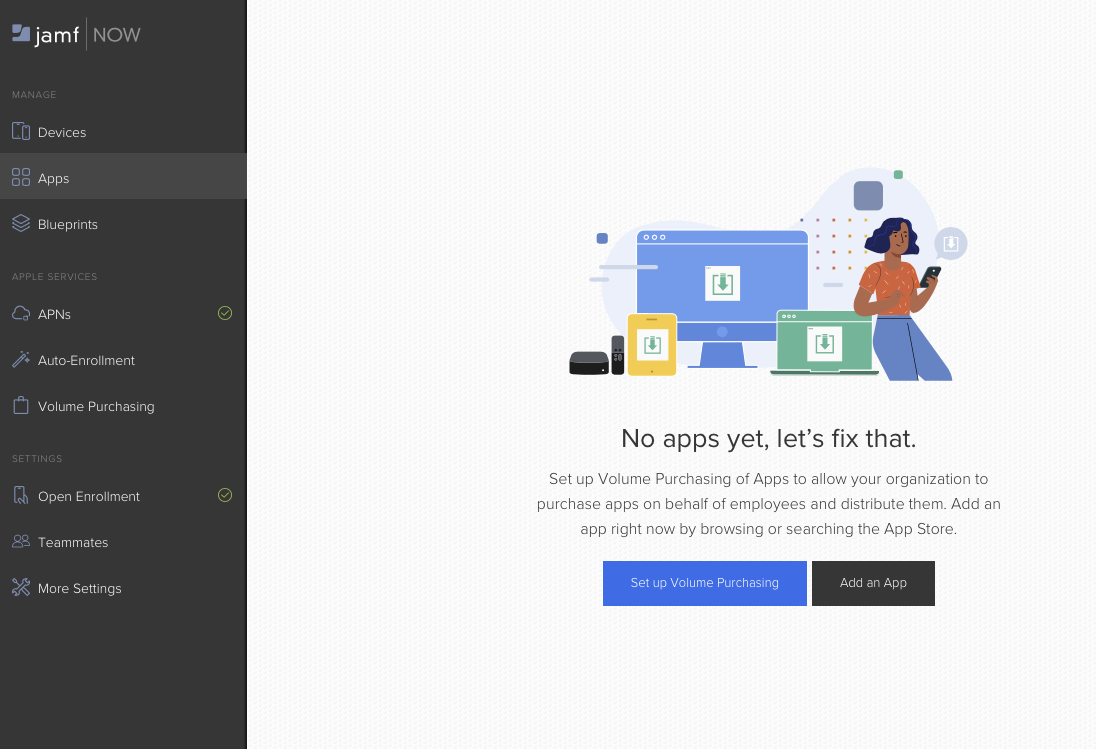
- Choose the "Apps" tab in the Jamf Now sidebar. It will show "No apps yet, let's fix that."
- Click "Add an App".
- On the "Add an App" page, click "Upload Your App" in the top menu.
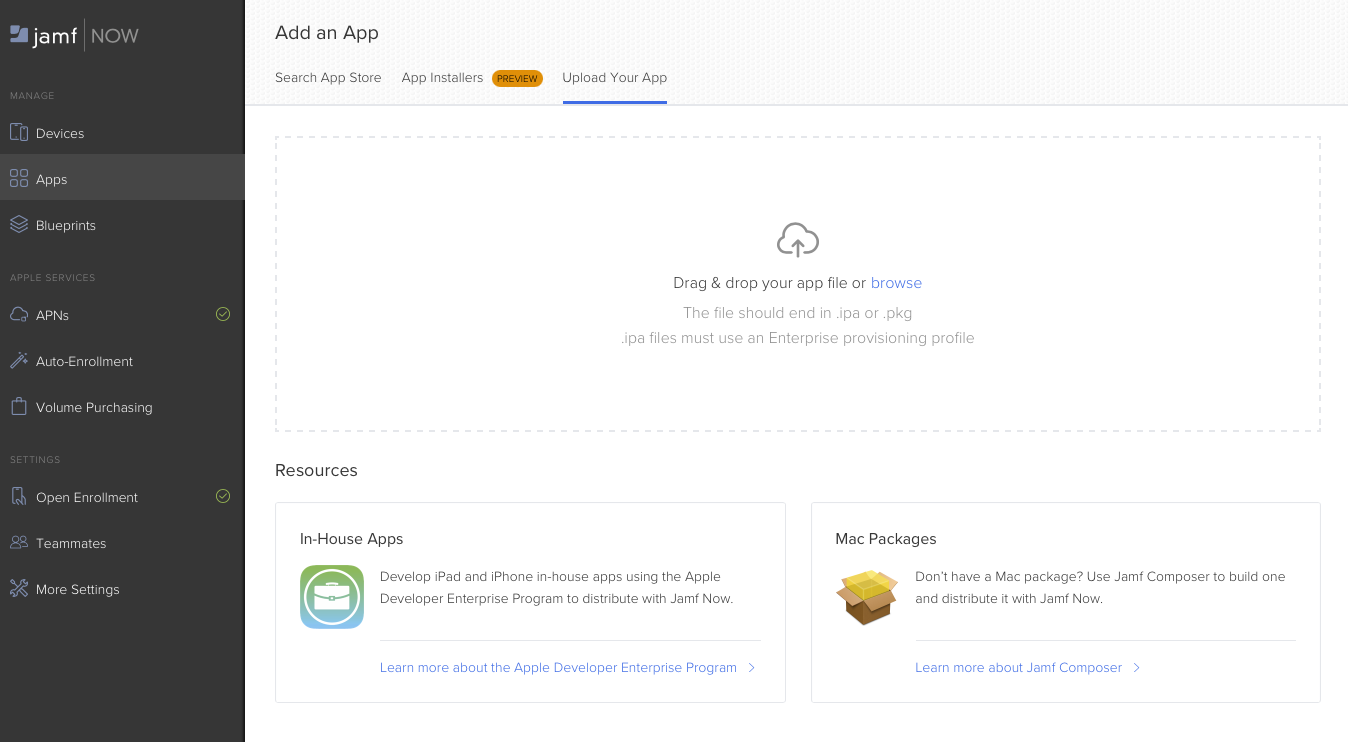
- Drag your LC Sensor package installer onto the page (or click "browse" to locate it) to upload it to Jamf.
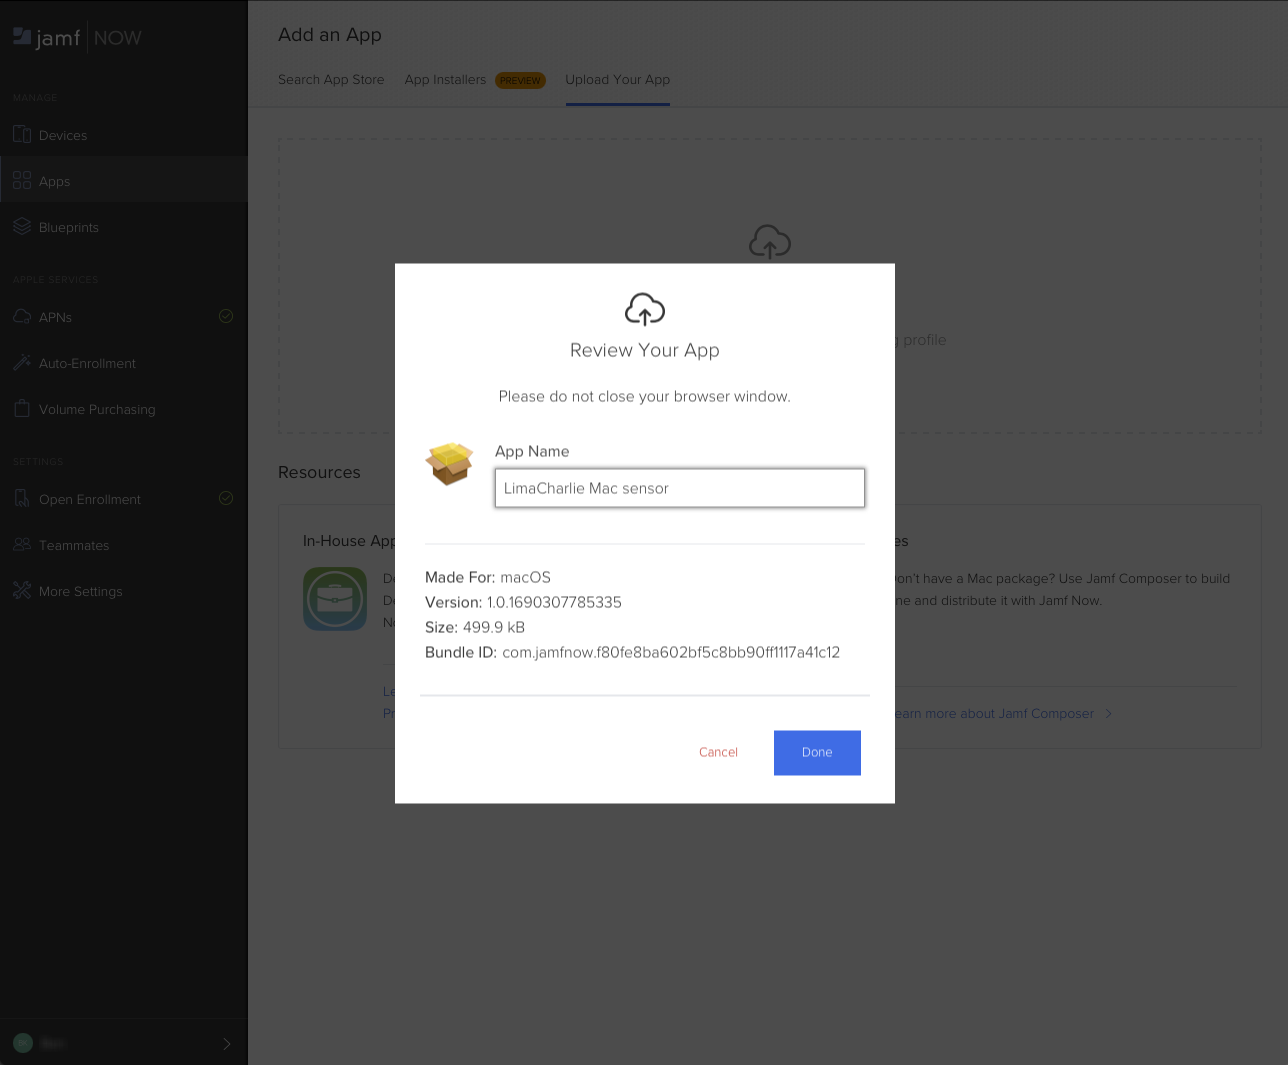
- Give the package an appropriate name, and click Done.
Prepare the LimaCharlie sensor provisioning on Jamf
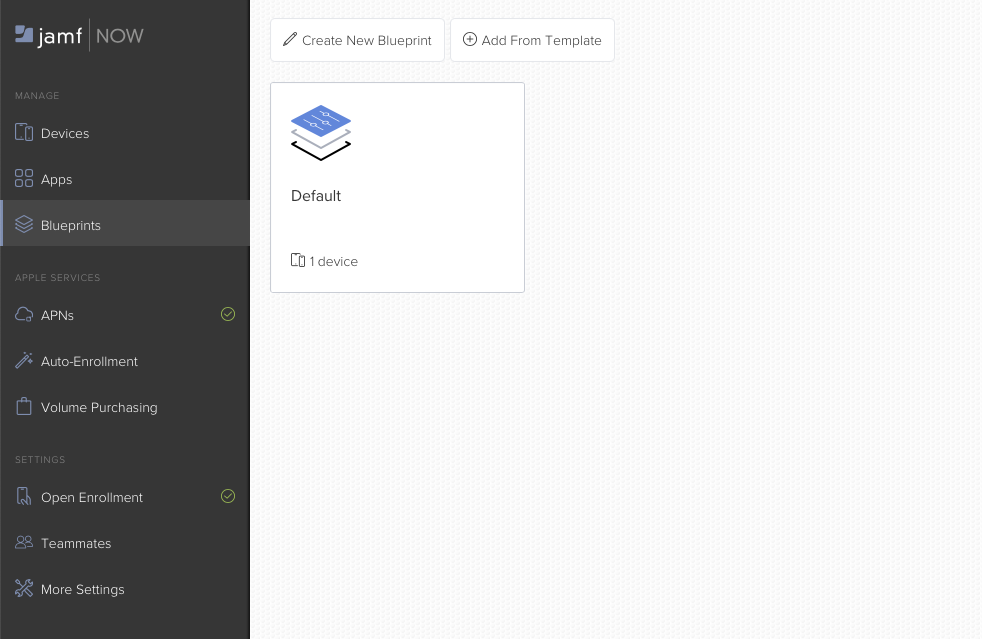
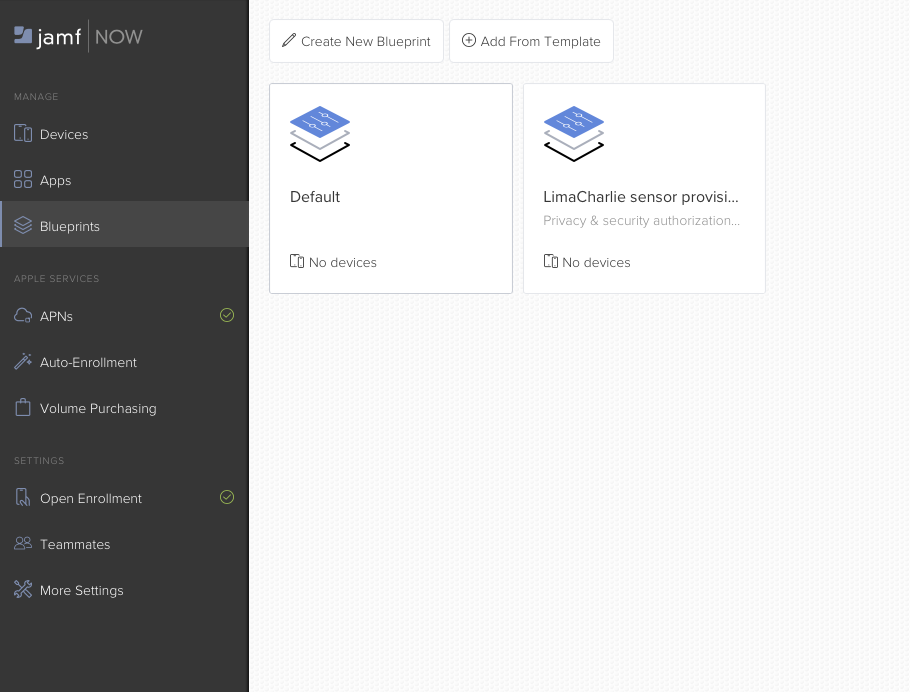
- Choose the "Blueprints" tab in the Jamf Now sidebar.
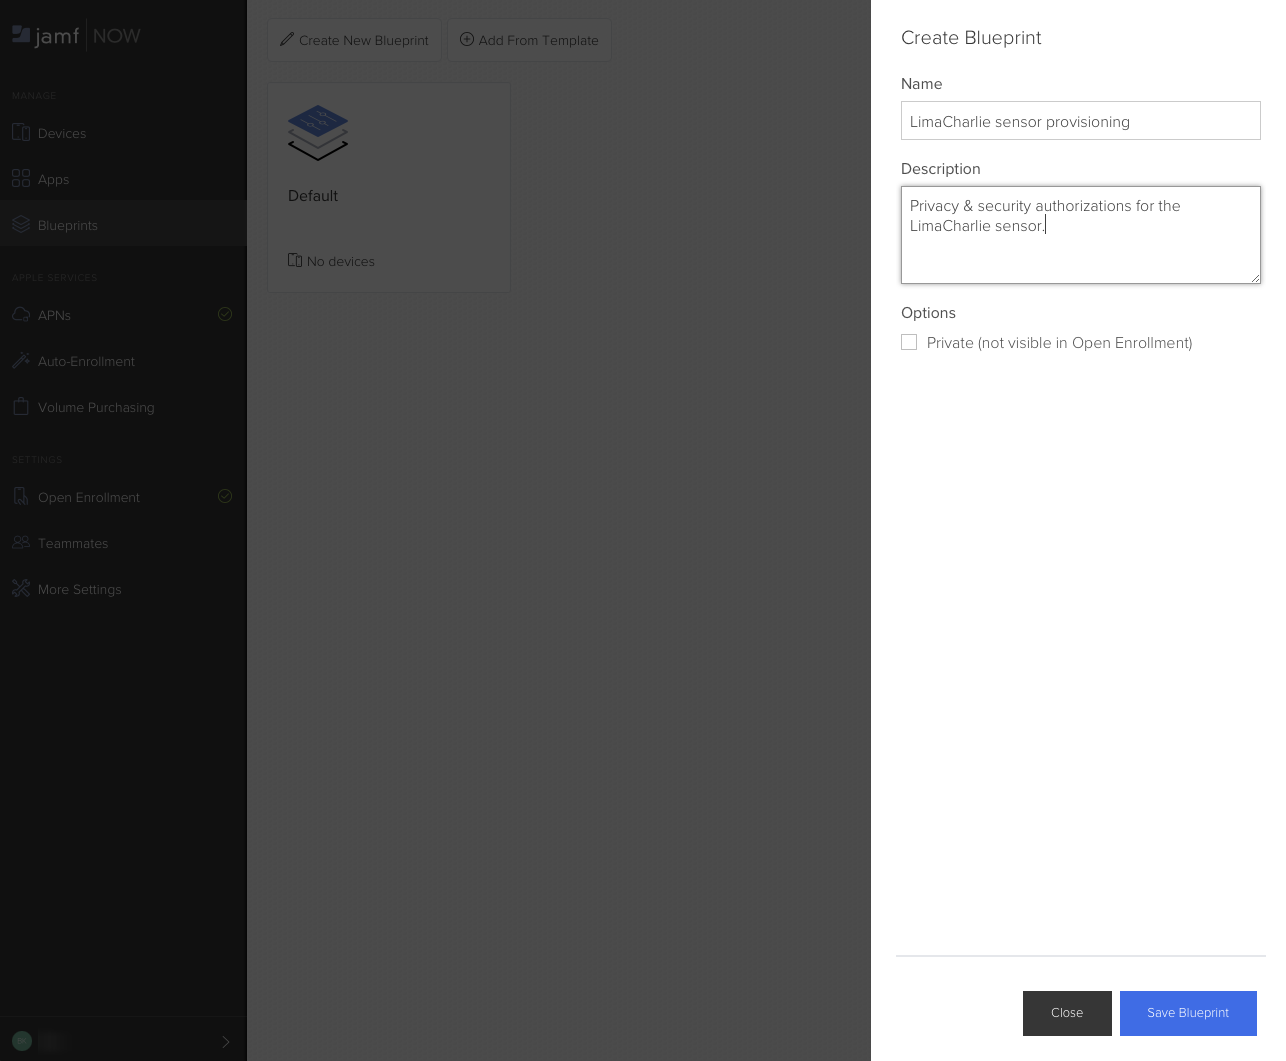
- Click "Create New Blueprint" at the top.
- Enter a meaningful Name and Description as prompted, and click Save Blueprint.
- Click on the entry for your new Blueprint.
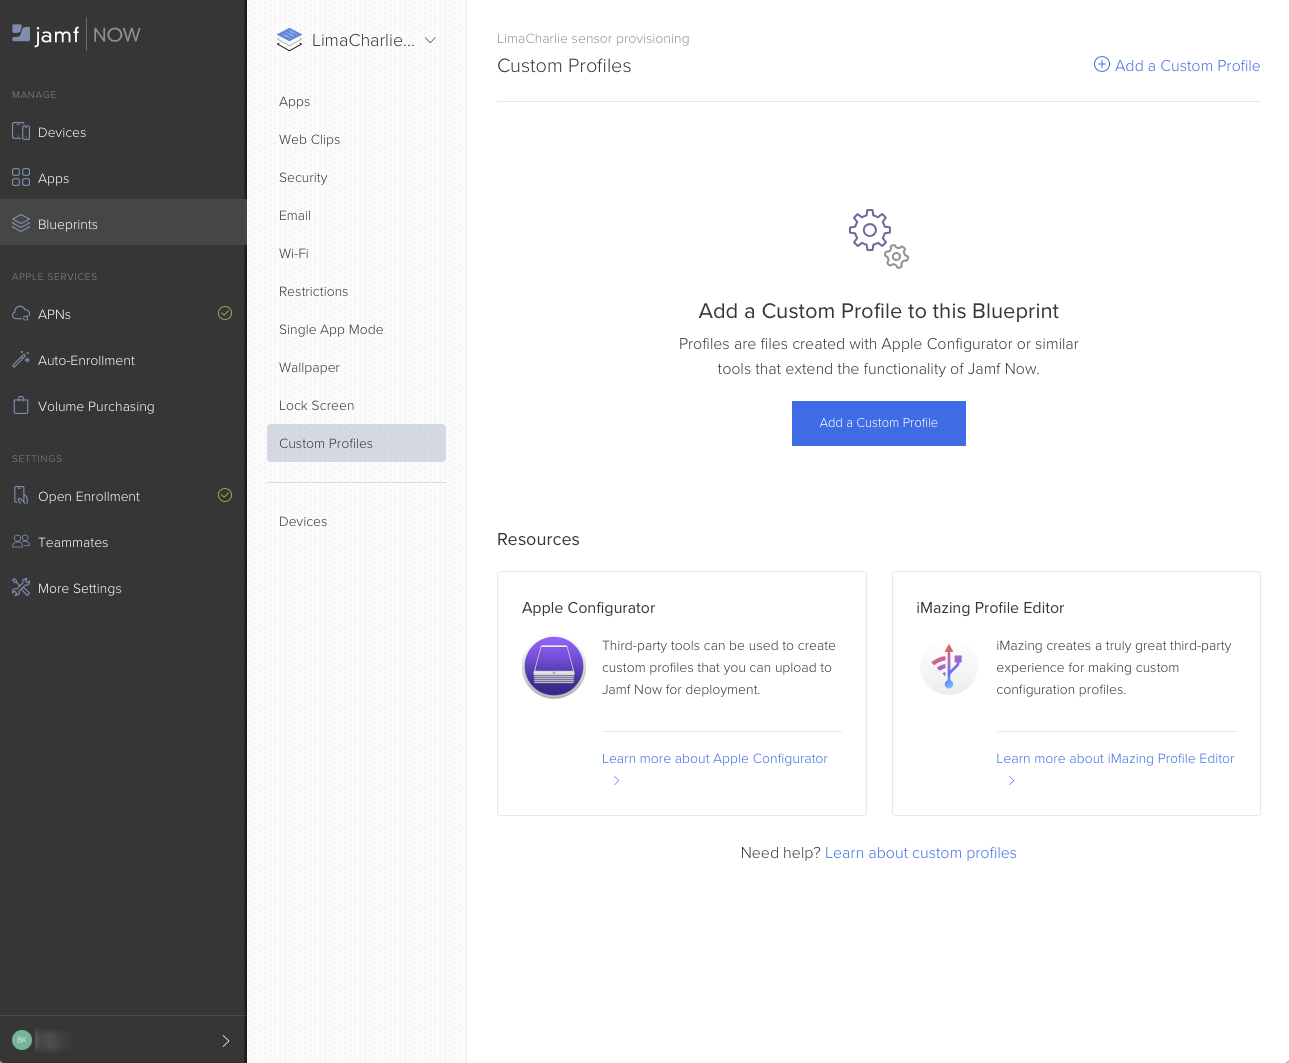
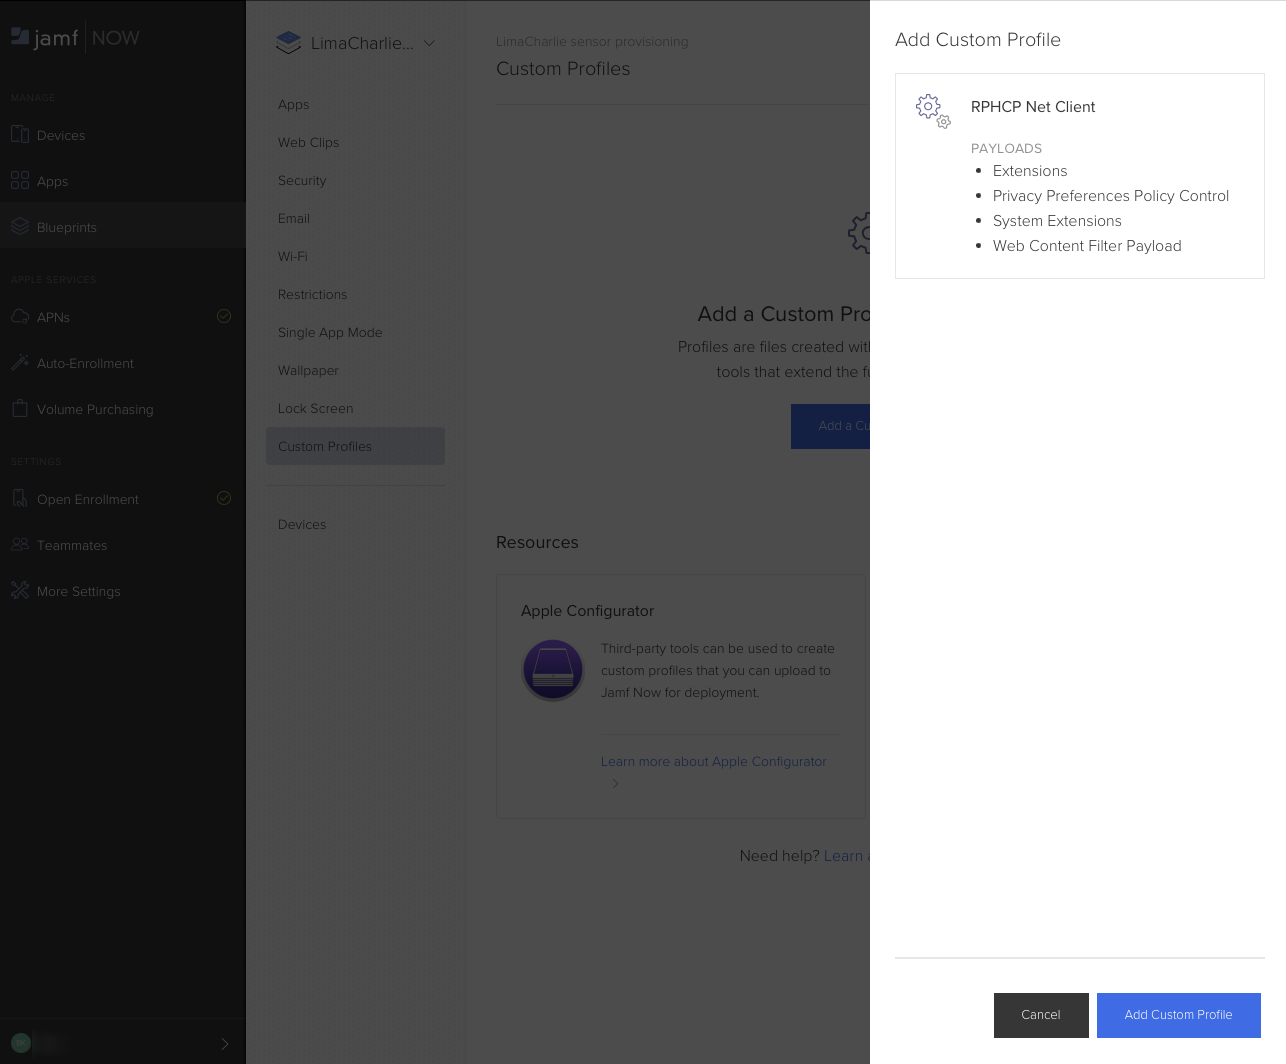
- On the inner tab bar that appears, click "Custom Profiles", and then "Add a Custom Profile".
- Drag your LimaCharlie mobileconfig file onto the page (or click "browse" to locate it) to upload it to Jamf.
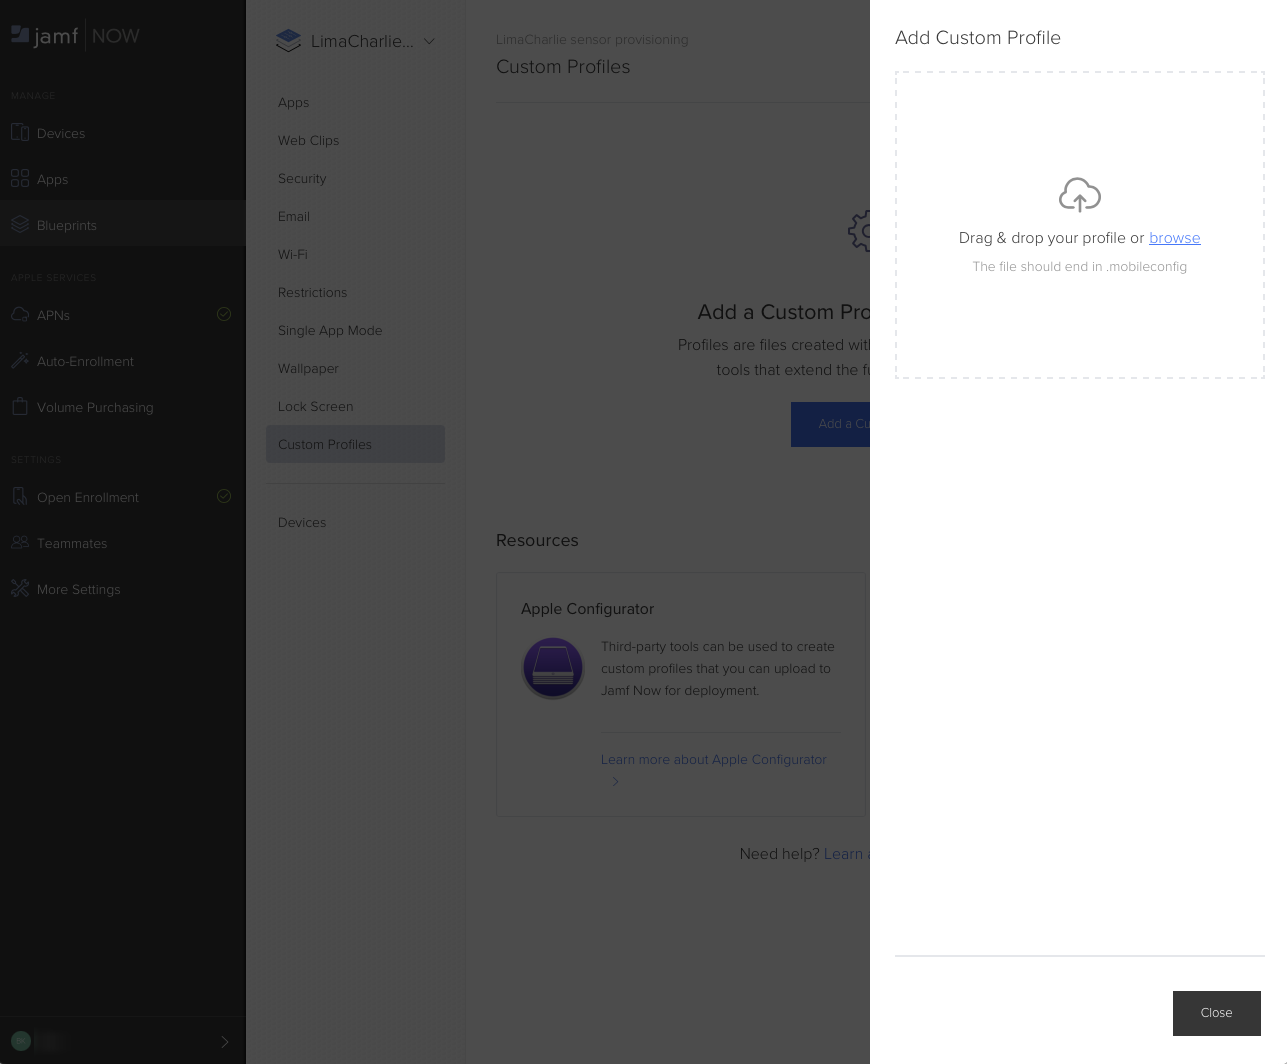
- Click "Add Custom Profile" in the lower right.
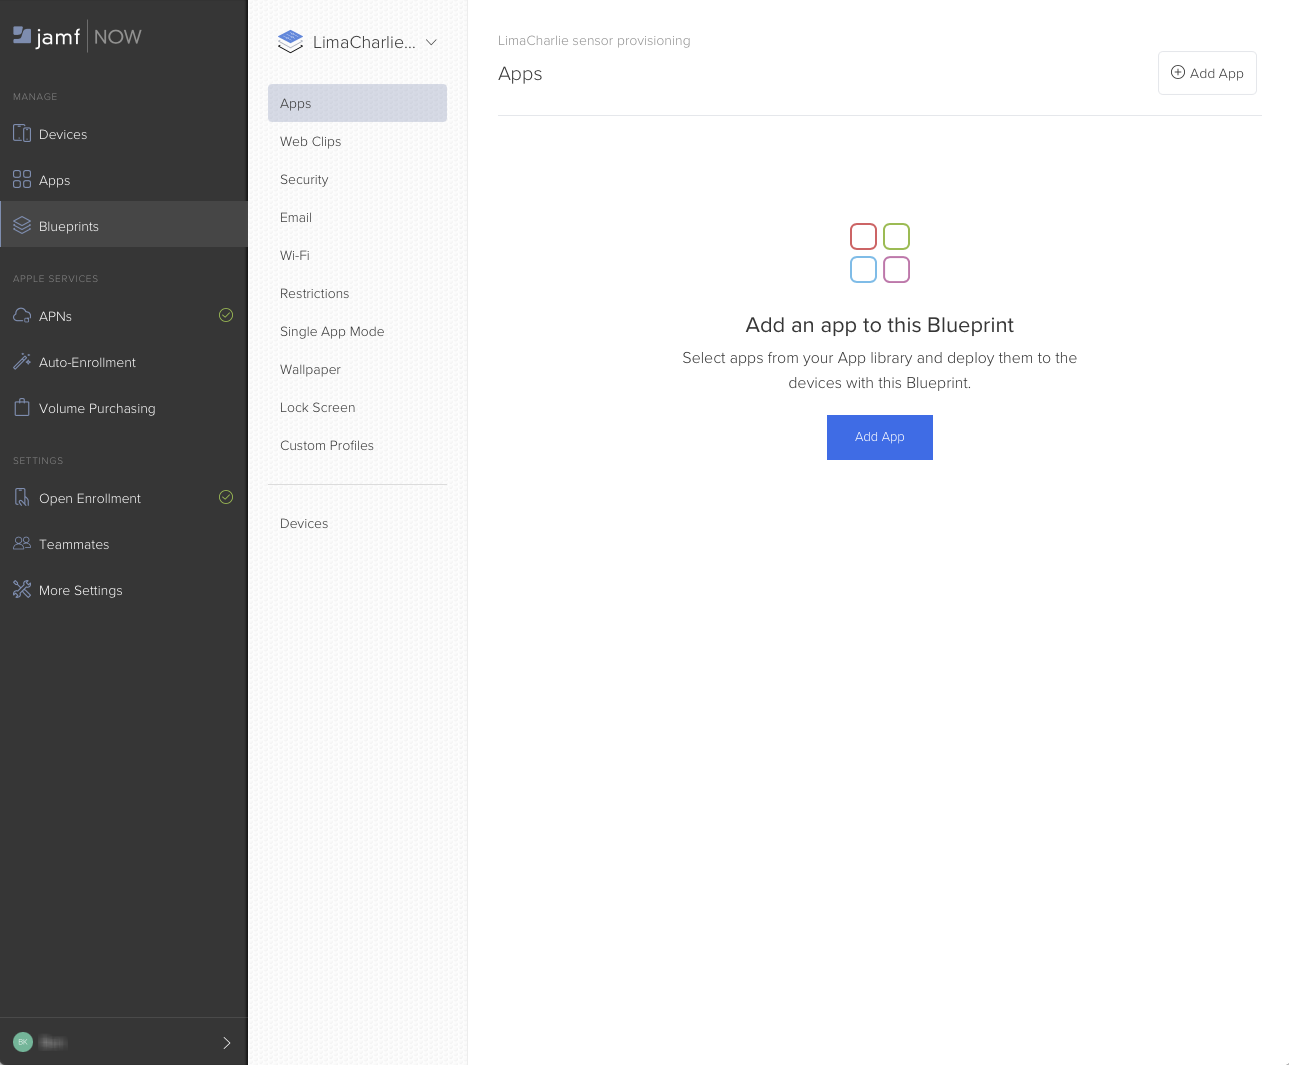
- On the inner tab bar, click "Apps", and then click "Add App".
- In the list, enable the "Install Automatically" checkbox for with the installer package that you uploaded earlier.
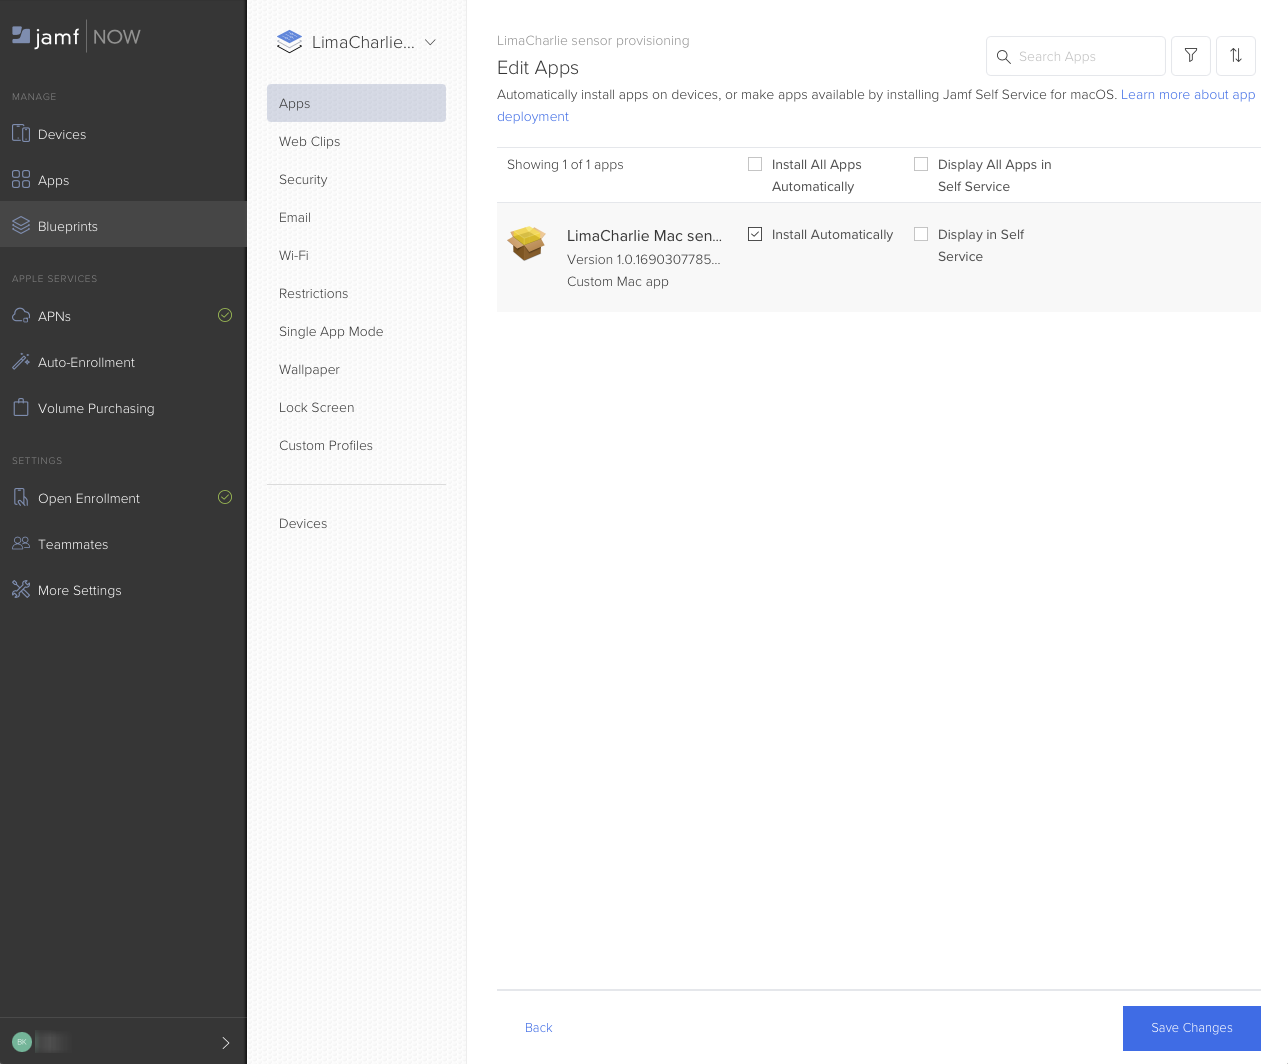
- Click "Save Changes" in the lower right.
Prepare Jamf Now to enroll devices
- Choose the "Devices" tab in the Jamf Now sidebar. It will show "No devices yet, let's fix that."
- Click "Enable Open Enrollment".
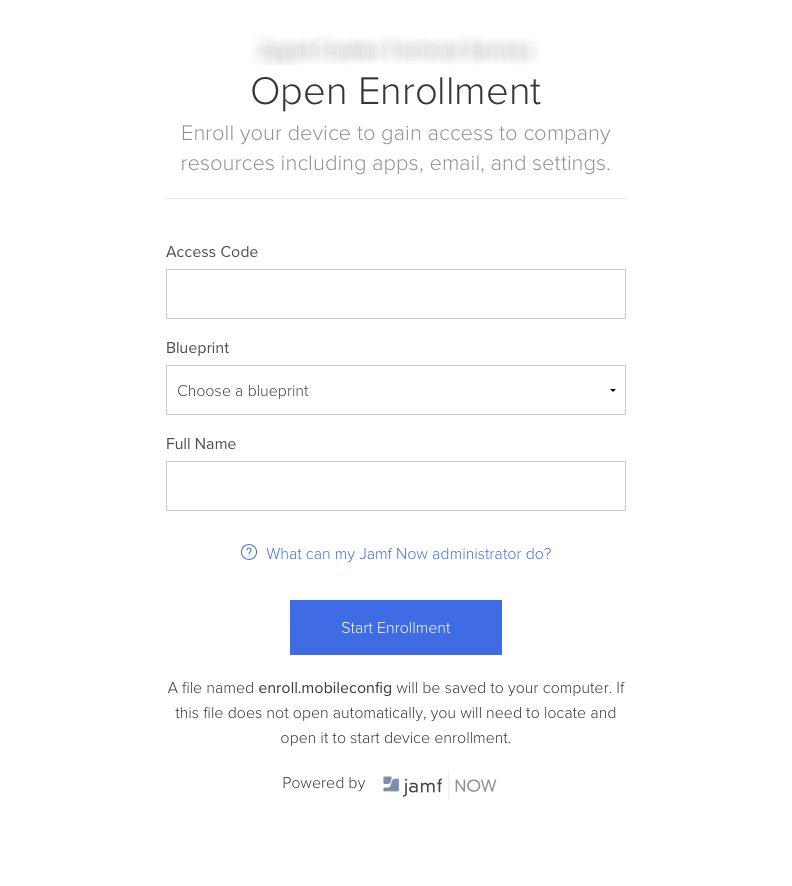
- On the "Open Enrollment" page, activate the "Enable Open Enrollment" checkbox, enter an Access Code as prompted, and click Save Settings.
- Take note of the indicated enrollment link.
Enroll a Mac for management in Jamf
The following recipe presumes the use of MacOS 13 (Ventura).
- On a subject Mac, visit the enrollment link from step 4 in the section above.
- Enter the appropriate Access Code and user name, and click Start Enrollment.
- Save the "enroll.mobileconfig" file that begins to download, and then open it in the Finder by double-clicking.
-
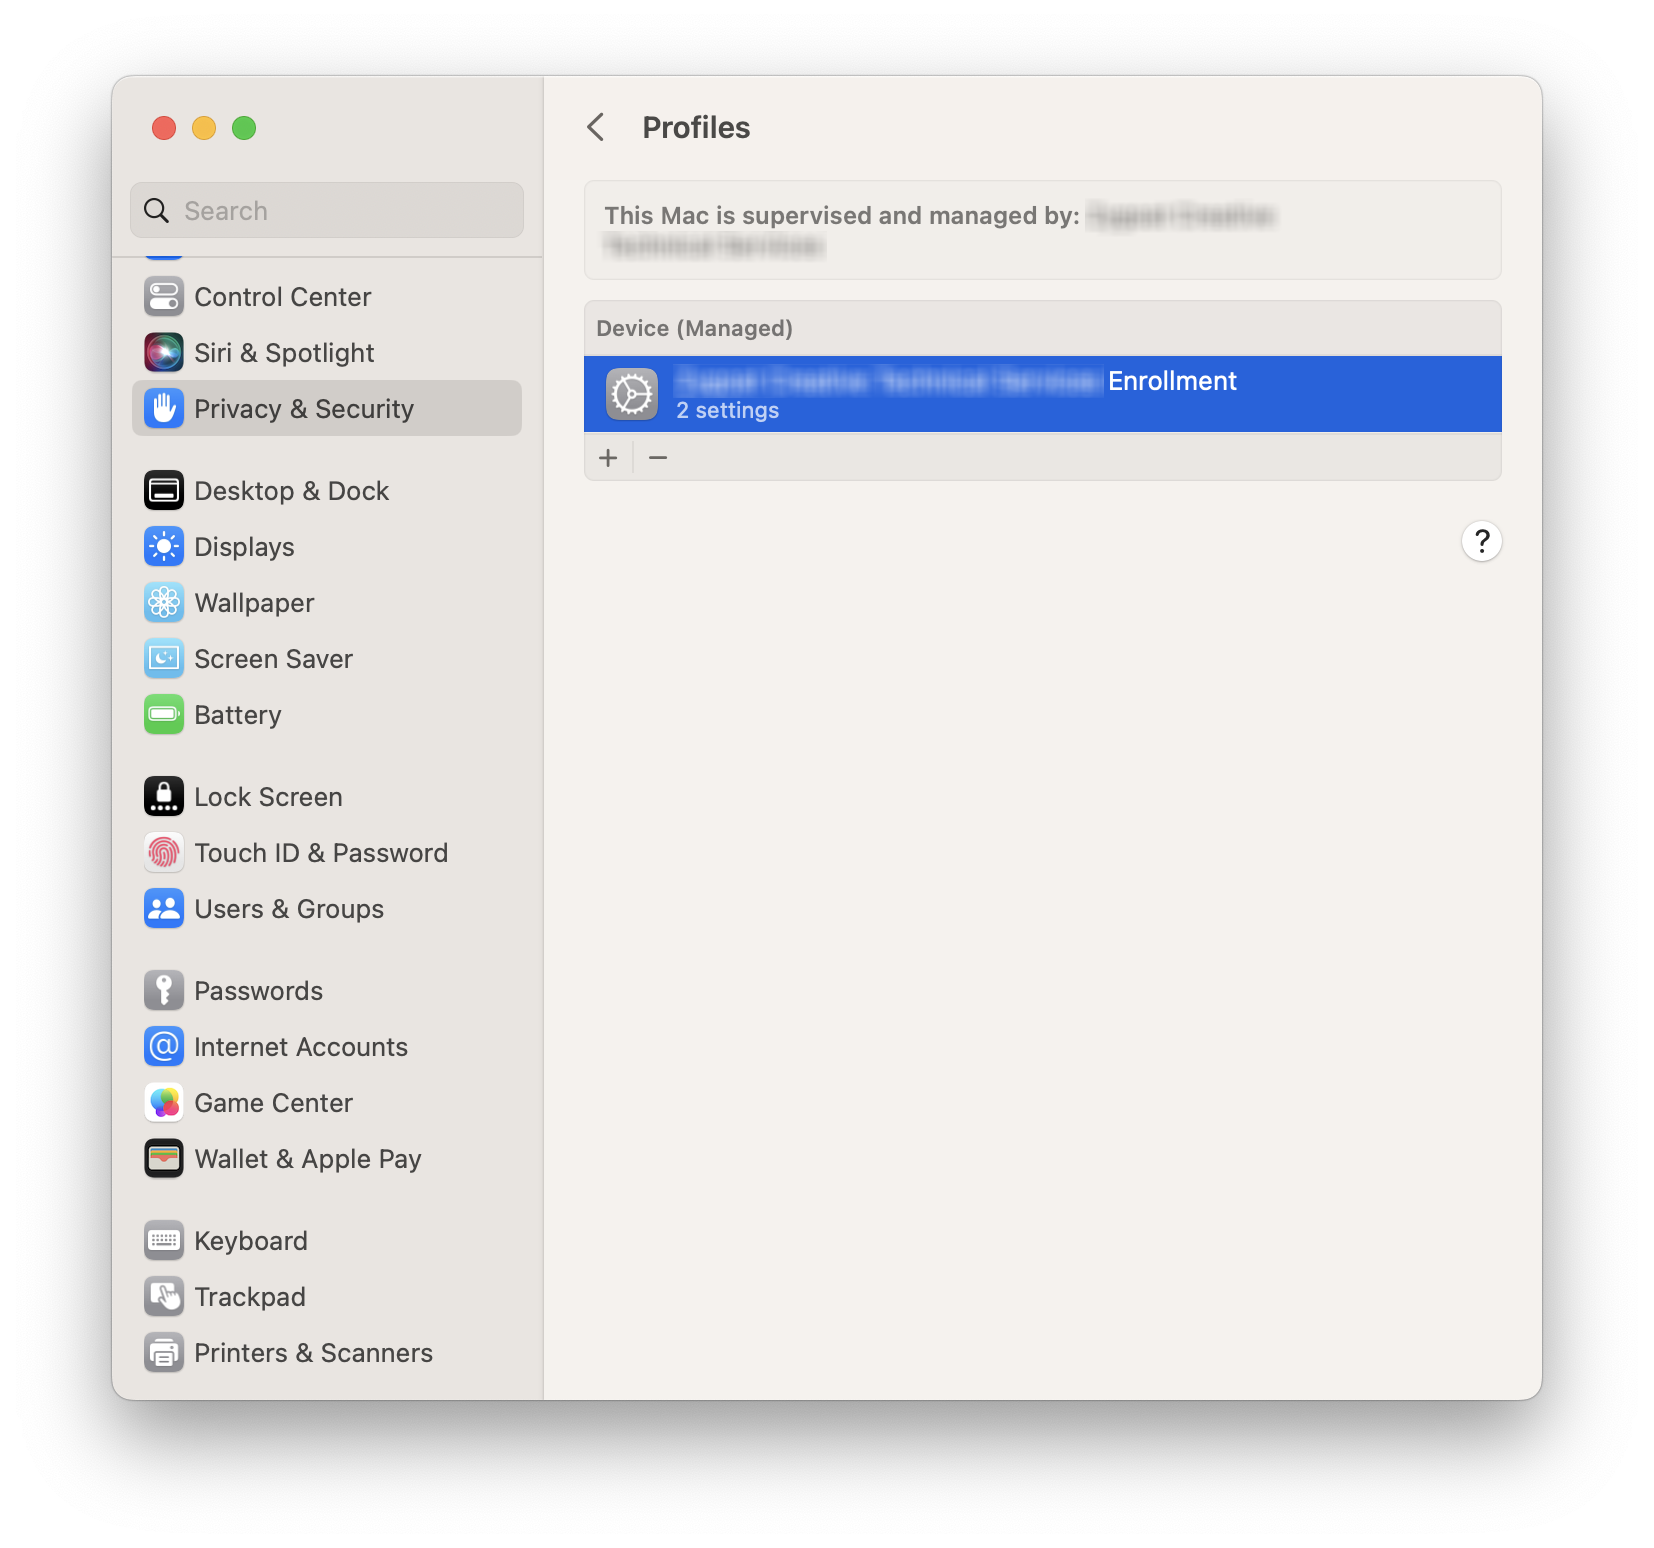
Open the System Settings app and navigate to the newly-installed profile.
-
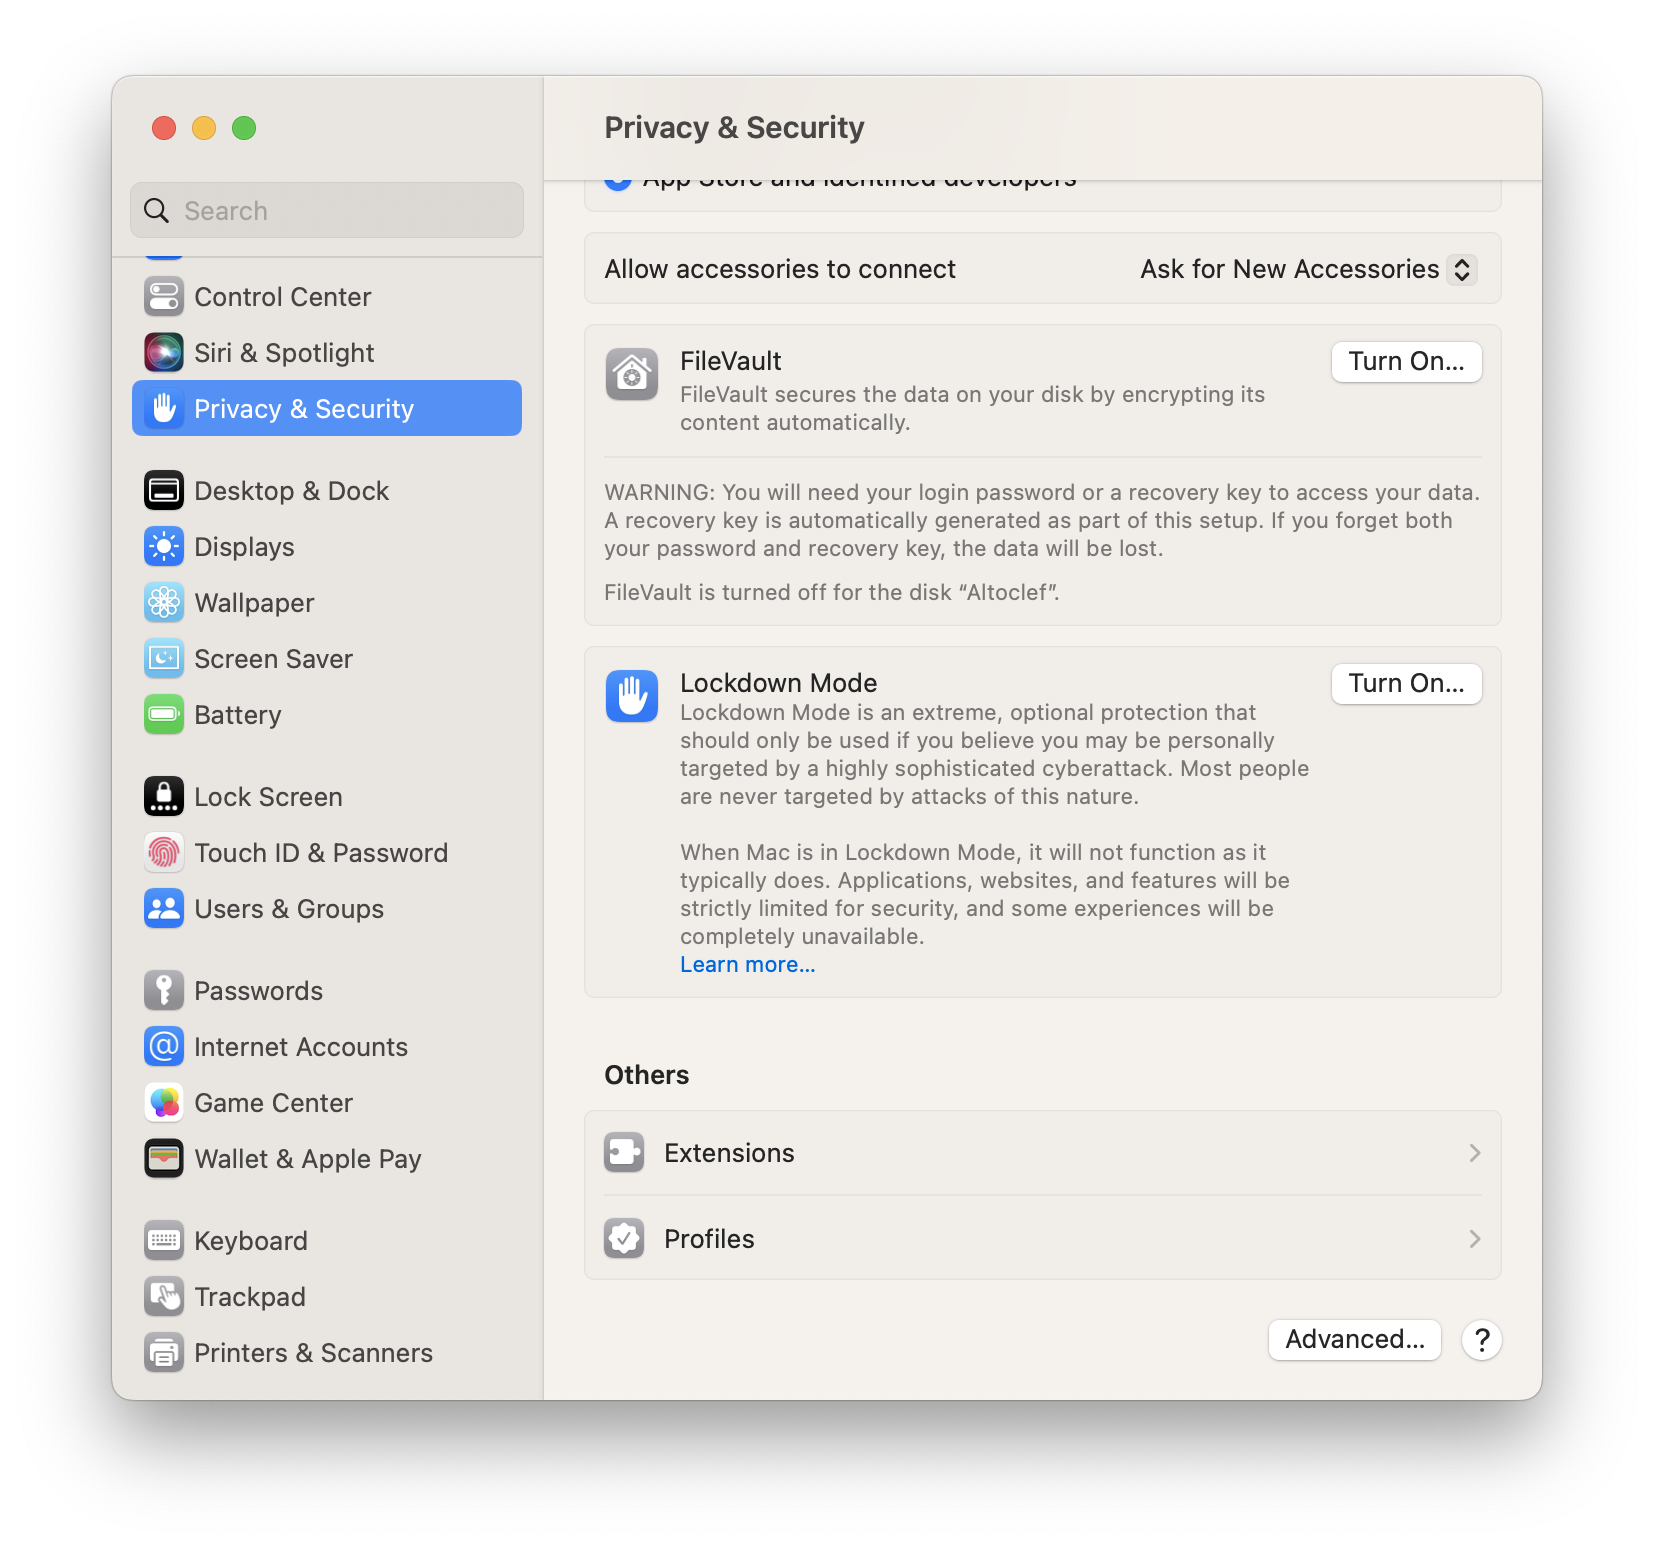
Choose "Privacy & Security".
- Scroll to the bottom, and under the "Others" heading, click "Profiles".
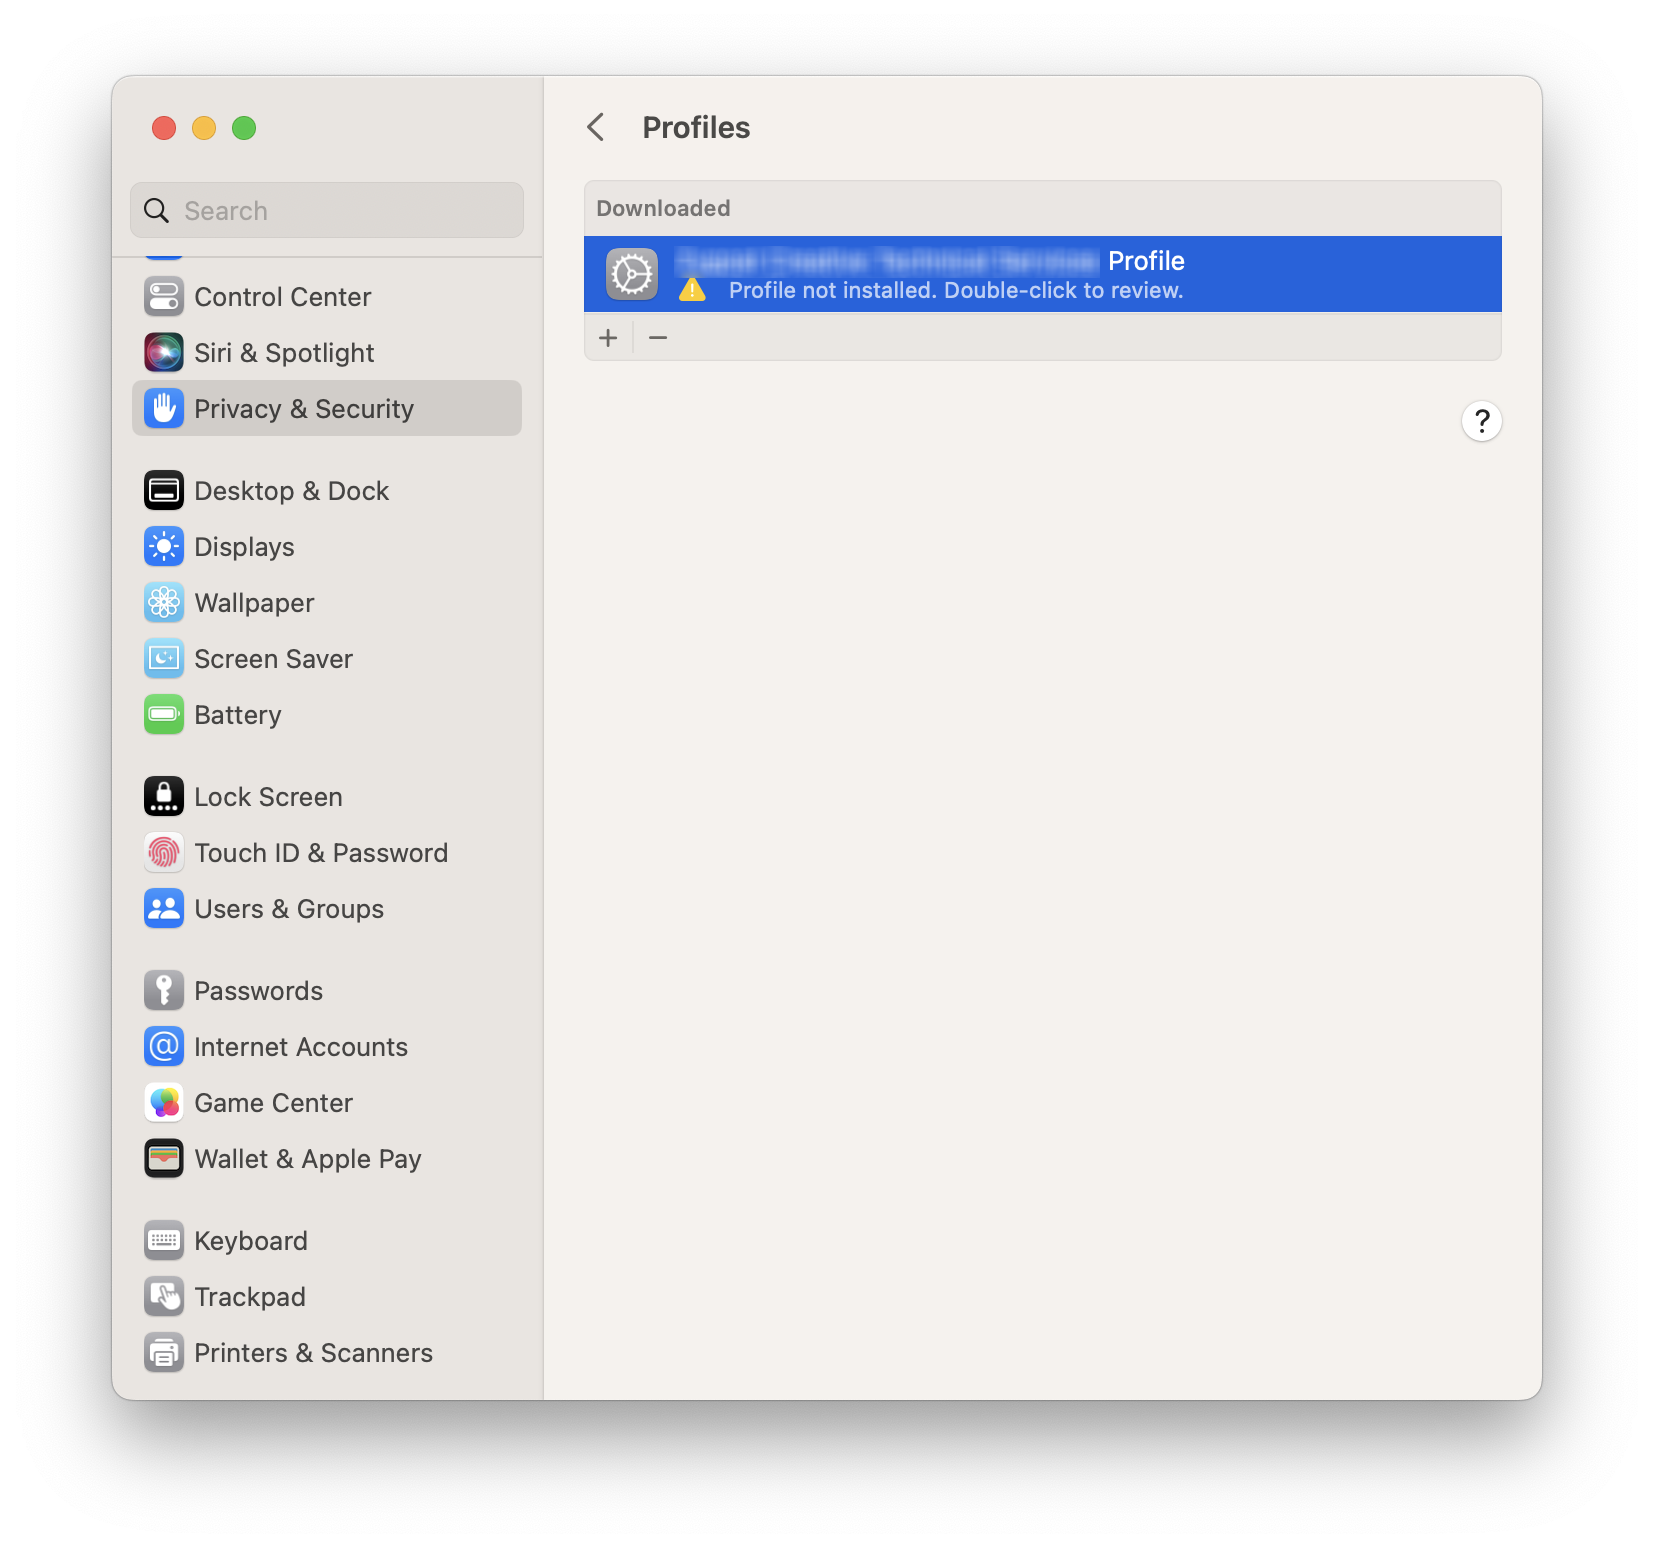
- Double-click on the " Profile".
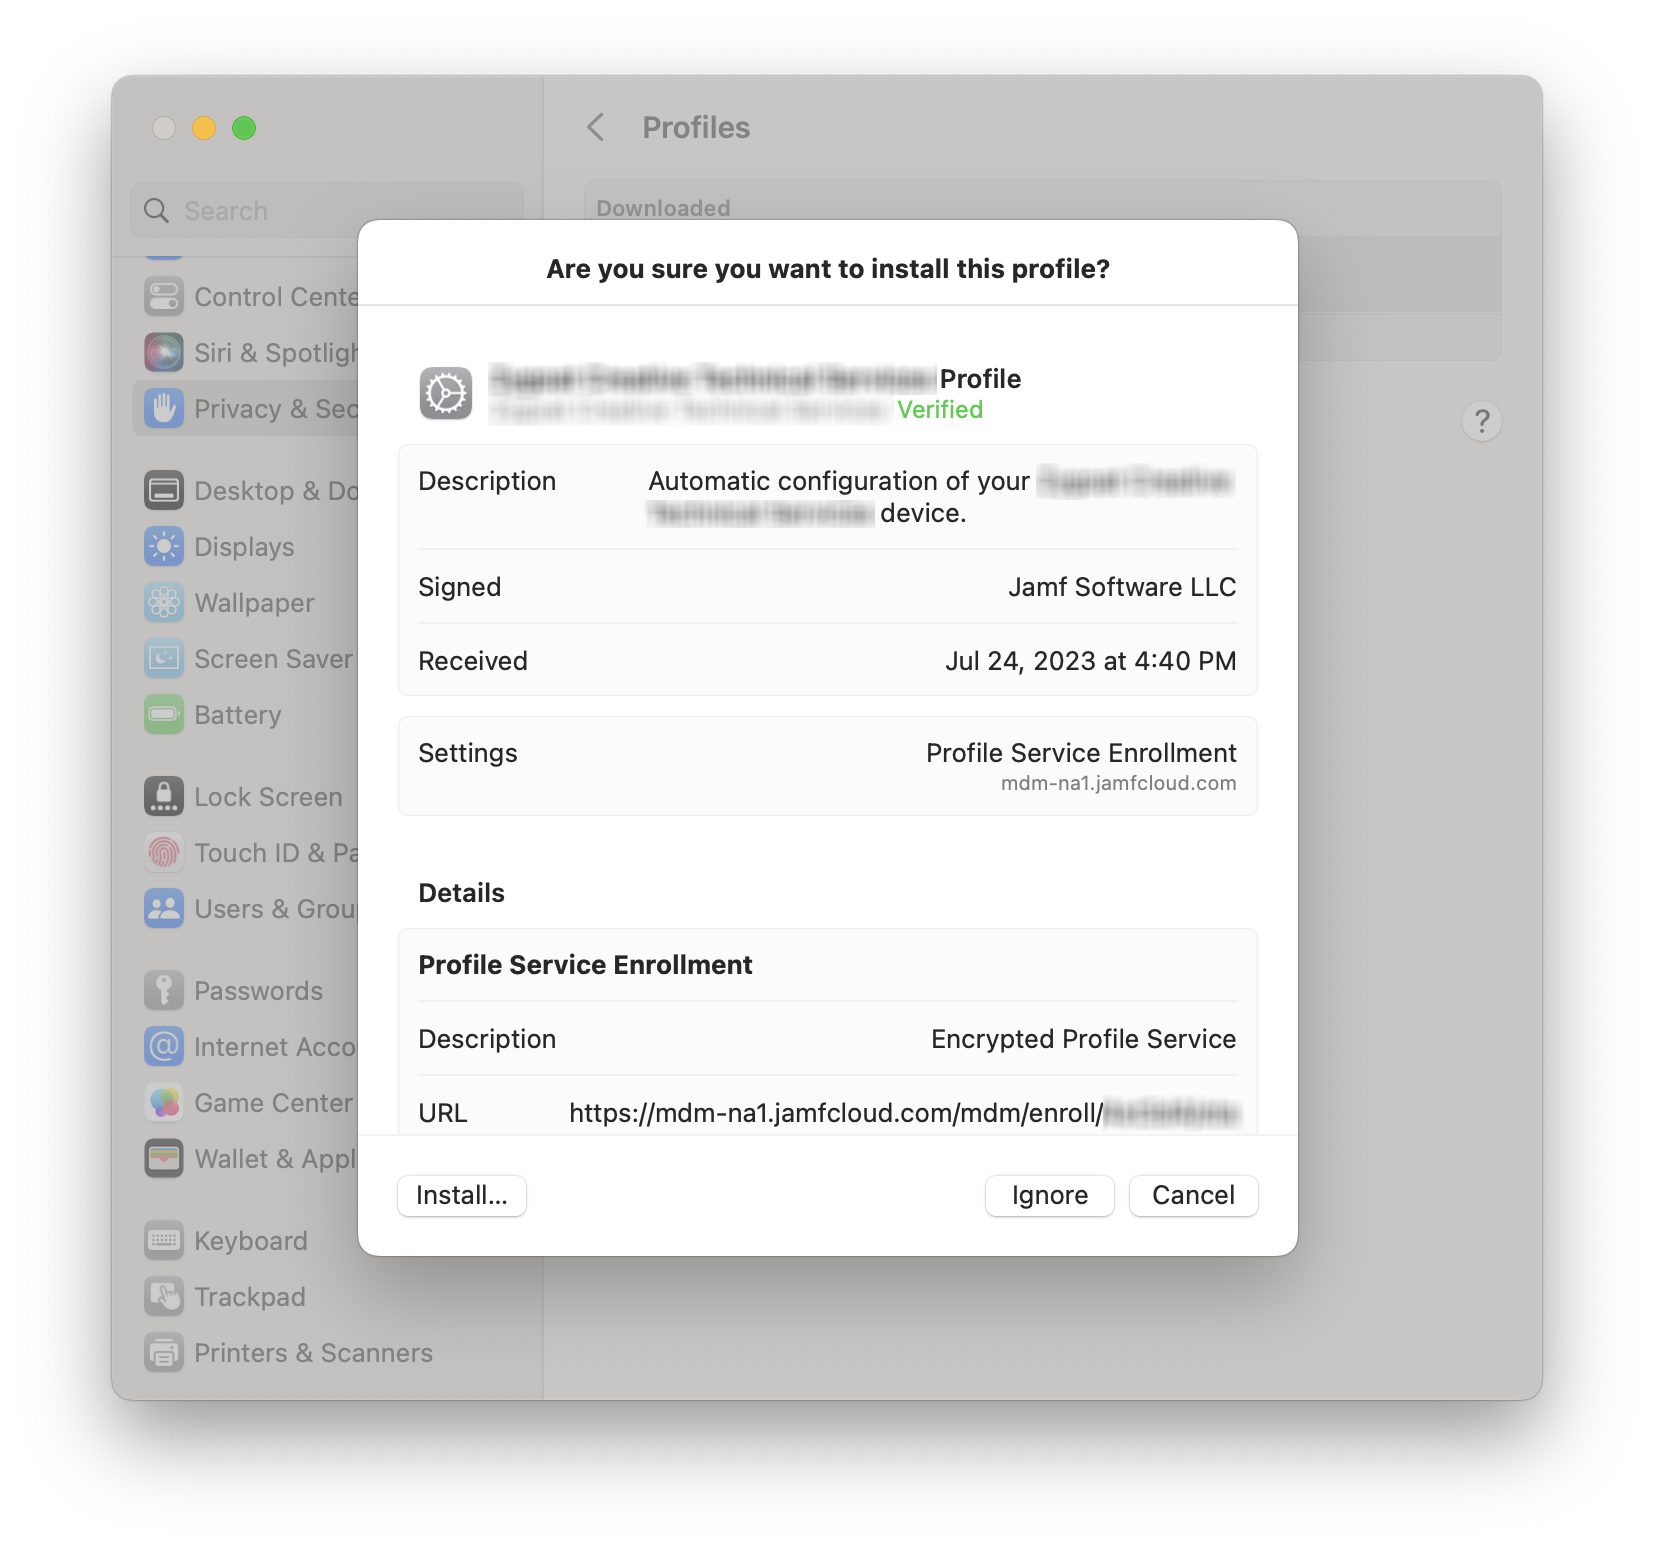
- Click "Install…" in the lower left.
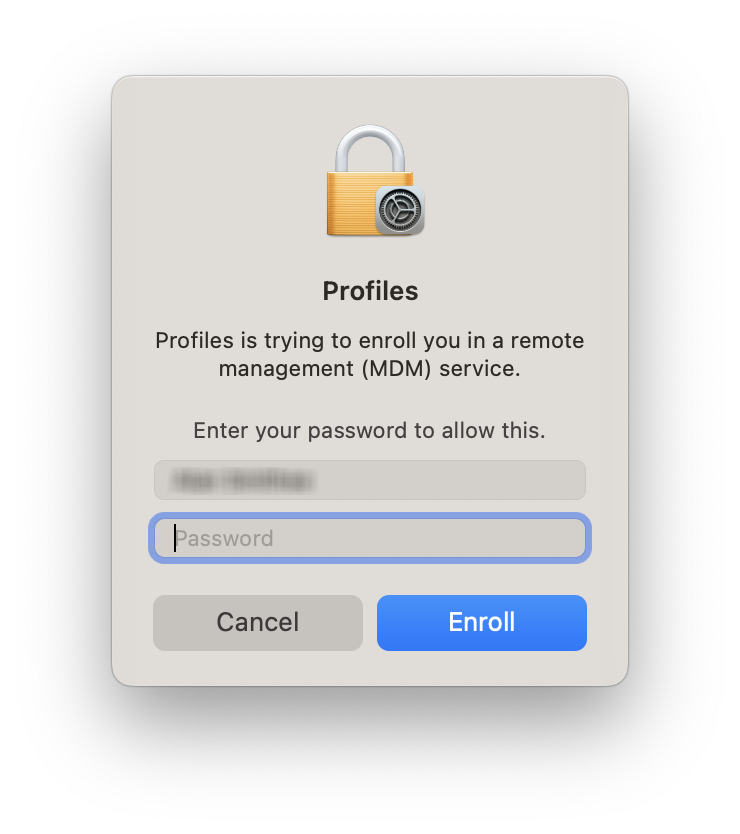
- Authenticate with the appropriate password when prompted with "Profiles is trying to enroll you in a remote management (MDM) service".
- Observe that System Settings declares "This Mac is supervised and managed by ".
Provision a Mac with the LimaCharlie sensor
- Choose the "Blueprints" tab in the Jamf Now sidebar.
- Click the entry for the custom Blueprint you created from Step 6 onward in the "Prepare the LC sensor package on Jamf" section above.

- On the inner tab bar that appears, click "Devices", and then "Add a Device".

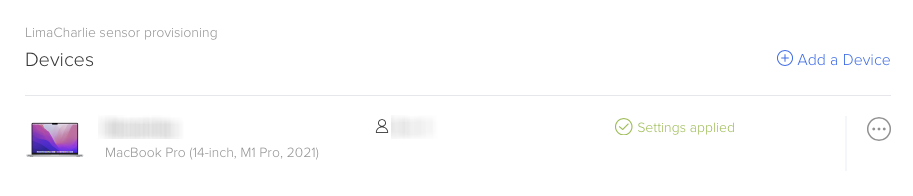
- Click on a device you want to provision, and then click "Add Devices" in the lower right corner.

-
Observe after a few moments that both the provisioning profile and the LimaCharlie sensor have been installed on the subject Mac.
-
The Mac appear in the Jamf Devices list on the Blueprints tab with the label "Settings applied". (It may initially appear as "Settings not applied"; simply refresh the page.)
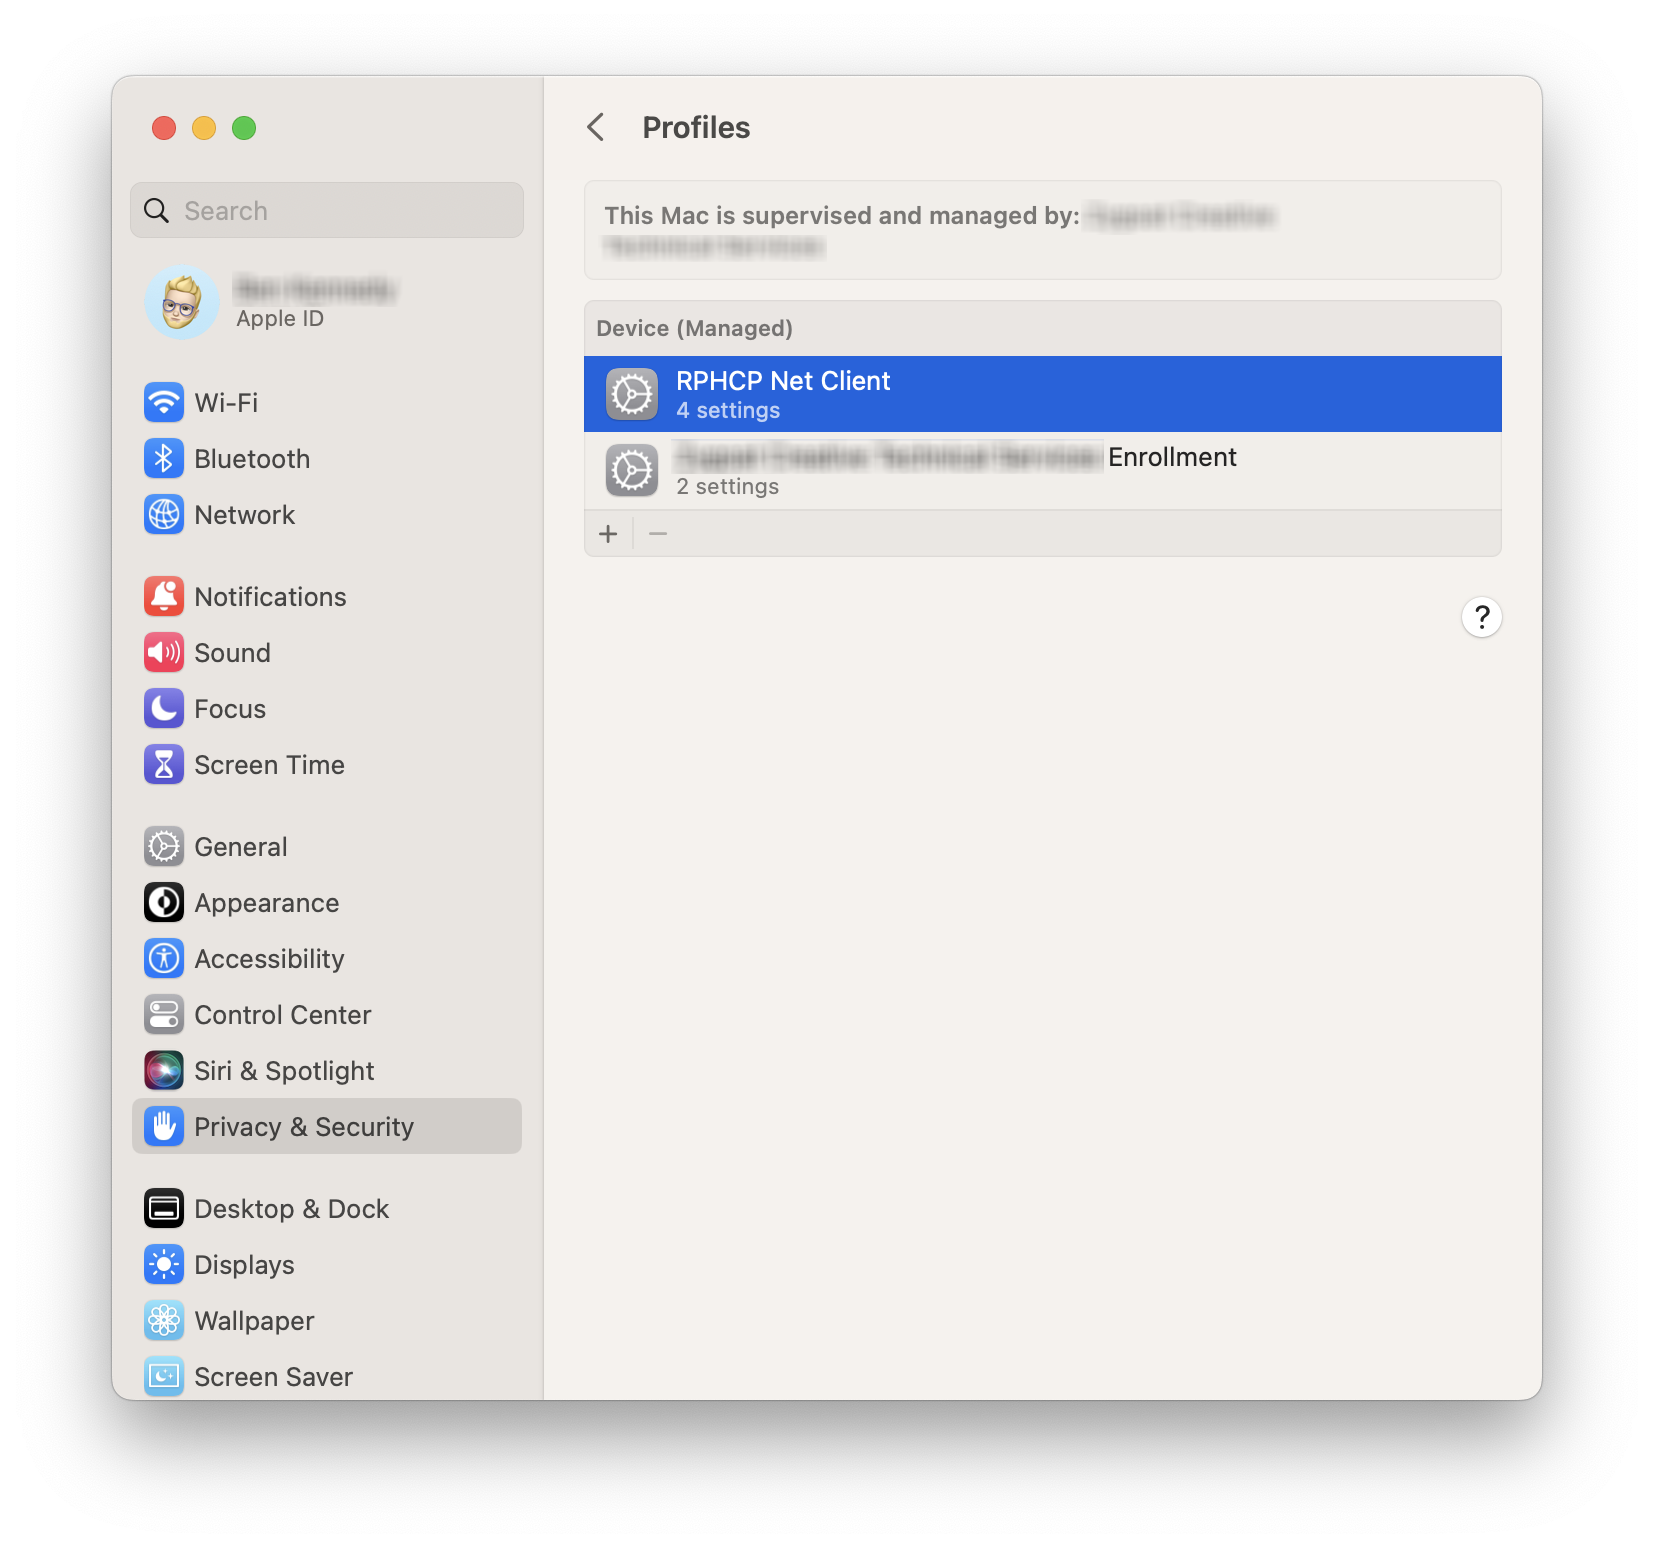
- On the Mac itself, an additional profile appears in System Settings > Privacy & Security > Profiles.
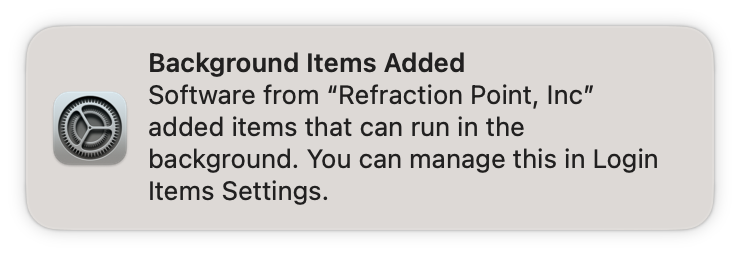
- A "Background Items Added" notification is displayed.
- The RPHCP.app appears in the Mac's Applications folder, and the rphcp daemon is running.